Child flows in Power Automate
Introduction
Many stages are required while creating flows in Power Automate, however, if you try to combine all of these actions into one flow, it may be challenging to navigate and keep that flow going.
By eliminating flows with hundreds of steps, you may manage flows easily by using child flows. So, using child flow will be very useful if you want to reuse the flow in different flows.
Parent and child flow setup:
- First, we need to create a solution, to put the child and parent flow in the same solution.
- Parent flow, this flow has a trigger to call the child flow.
- Child flow, this flow use responds to PowerApps or flow to pass the data to parent flow.
A simple example of building child flow:
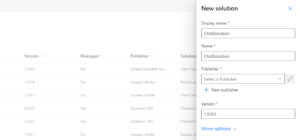
- First, we need to create a new solution

Figure 1: Create a new solution
- Add a new flow to your solution (child flow), build the flow as you want, and at the end, add Respond to PowerApps or flow to pass the data to the parent flow.

Figure 2: Create child flow
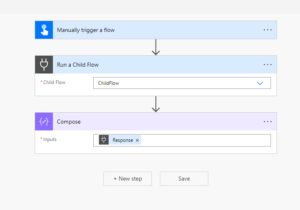
- Add a new flow to your solution (parent flow), to call the child flow, you want to add Run a child flow action then you can get the output from it.

Figure 3: Parent flow
Now that our Solution has been created, we can proceed by setting up our nested flow configuration. You need to start with the child flow, otherwise, you cannot call it from your parent flow, so it’s important that you write out your nested flow configuration before you start building it!

