How to use Azure Data Lake Gen 2 with Power BI
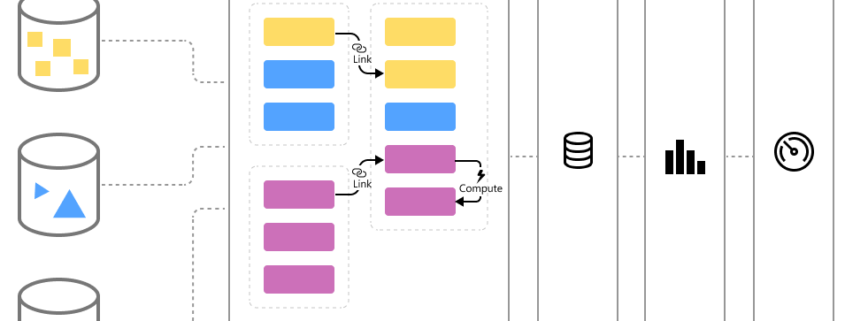
Data used with Power BI is stored in internal storage provided by Power BI by default. With the integration of dataflows and Azure Data Lake Storage Gen 2 (ADLS Gen2), you can store your dataflows in your organization’s Azure Data Lake Storage Gen2 account. This essentially allows you to “bring your own storage” to Power BI dataflows and establish a connection at the tenant or workspace level.
Why use ADLS Gen2 storage?
In general, having your space with ADLS Gen2 has a lot of importance. To take a closer look at the overall of this Data lake, you can find it here.
Furthermore, to talk about its importance in the use of Power BI, so after you attach your dataflow, Power BI configures and saves a reference so that you can now read and write data to your own ADLS Gen 2.
Power BI stores the data in the CDM format, which captures metadata about your data in addition to the actual data generated by the dataflow itself. This unlocks many powerful capabilities and enables your data and the associated metadata in CDM format to now serve extensibility, automation, monitoring, and backup scenarios. By making this data available and widely accessible in your own environment, it enables you to democratize the insights and data created within the organization.
It also unlocks the ability for you to create further solutions that are either CDM aware (such as custom applications and solutions in Power Platform, Azure, and those available through partner and ISV ecosystems) or simply able to read a CSV. Your data engineers, data scientists, and analysts can now work with, use, and reuse a common set of data that is curated in ADLS Gen 2.
What is the structure of ADLS Gen2 workspace connection?
In the ADLS Gen 2 storage account, all dataflows are stored in the Power BIcontainer of the filesystem.
The structure of the Power BI container looks like this: <workspace name>/<dataflow name>/model.json <workspace name>/<dataflow name>/model.json.snapshots/<all snapshots>
The location where dataflows store data in the folder hierarchy for ADLS Gen 2 is determined by whether the workspace is located in shared capacity or Premium capacity. The file structure after refresh for each capacity type is shown in the table below.
How to retrieve from ADLS Gen2?
Once the dataflow storage has been configured to use Azure Data Lake Gen 2, there is no way to automatically revert. The process to return to Power BI-managed storage is manual.
To revert the migration that you made to Gen 2, you will need to delete your dataflows and recreate them in the same workspace. Then, since we don’t delete data from ADLS Gen 2, go to the resource itself and clean up data. This would involve the following steps:
- Export a copy of the dataflow from Power BI. Or, copy the model.json file. The model.json file is stored in ADLS.
- Delete the dataflows.
- Detach ADLS.
- Recreate the dataflows using import. Note that incremental refresh data (if applicable) will need to be deleted prior to import. This can be done by deleting the relevant partitions in the model.json file.
- Configure refresh / recreate incremental refresh policies.
For BI analysts, most of importance is central to Power BI and how to connect ADLS Gen2, and here it is the way to deal with, starting from PBI Desktop:
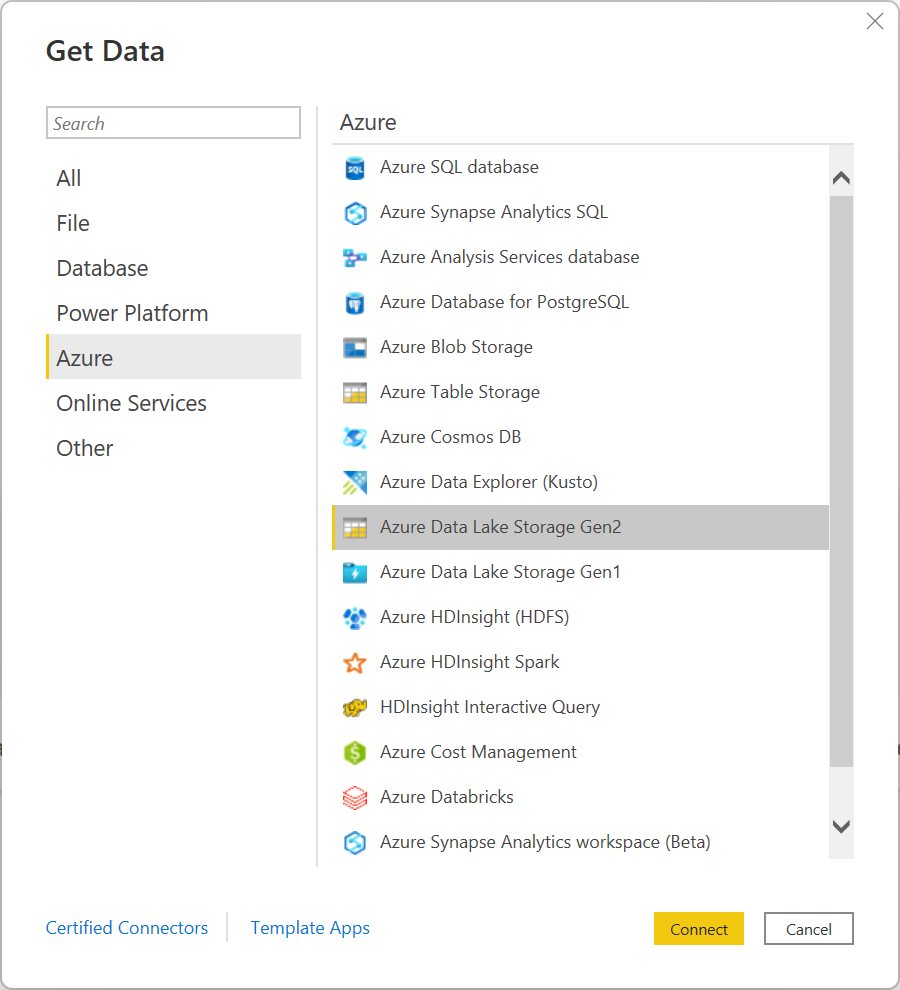
1. Select the Azure Data Lake Storage Gen2 option in the Get Data selection, and then select Connect. More information:
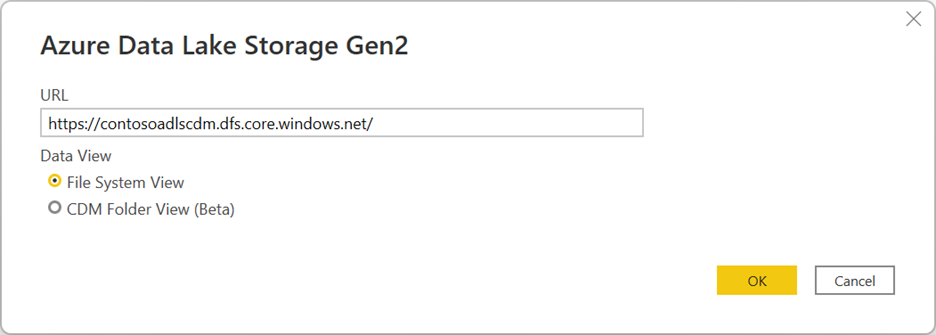
2. In the Azure Data Lake Storage Gen2 dialog box, provide the URL to your Azure Data Lake Storage Gen2 account, container, or subfolder using the container endpoint format. URLs for Data Lake Storage Gen2 have the following pattern:
https://<accountname>.dfs.core.windows.net/<container>/<subfolder>
You can also select whether you want to use the file system view or the Common Data Model folder view.
Select OK to continue.
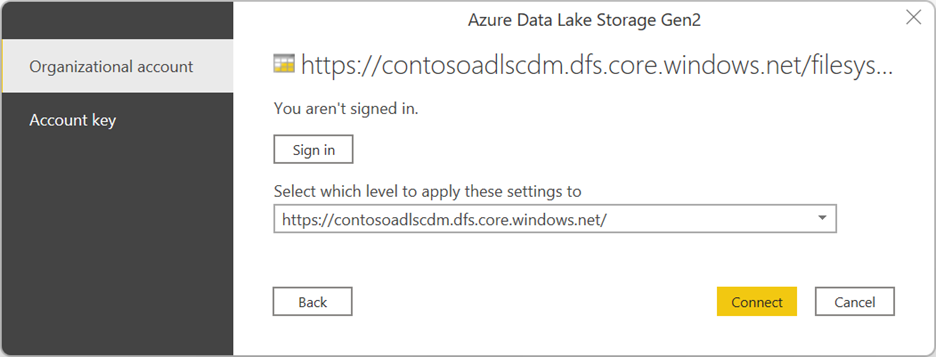
3. If this is the first time you’re using this URL address, you’ll be asked to select the authentication method.
If you select the Organizational account method, select Sign in to sign into your storage account. You’ll be redirected to your organization’s sign-in page. Follow the prompts to sign into the account. After you’ve successfully signed in, select Connect.
If you select the Account key method, enter your account key and then select Connect.
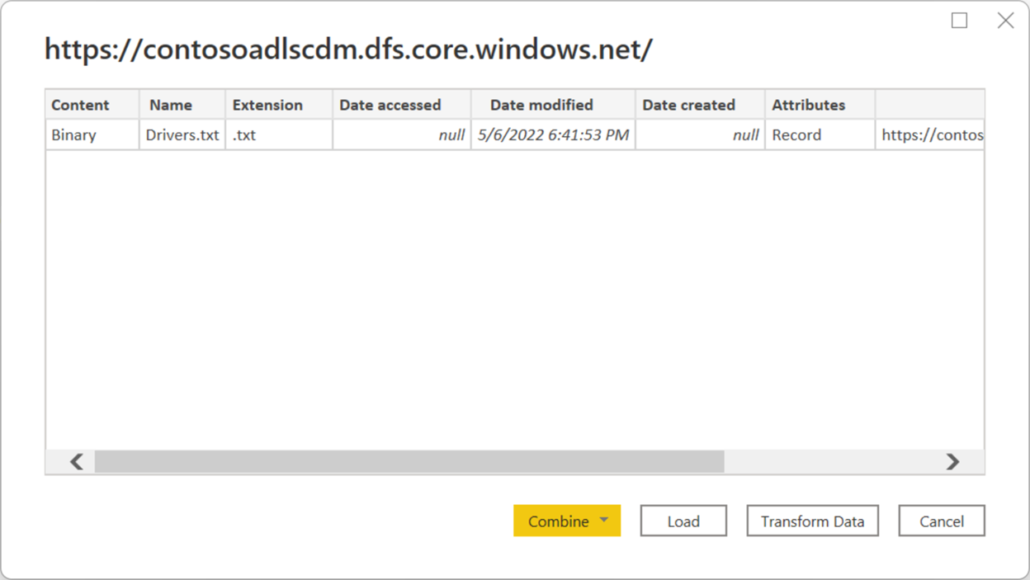
4. The Navigator dialog box shows all files under the URL you provided. Verify the information and then select either Transform Data to transform the data in Power Query or Load to load the data.
In this article, we have articulated the way you can democratize your data and data insights using Azure Data Lake Storage and how Data can be retrieved from ADLS. And now a data analyst in your company can easily collaborate and benefit from ADLS Gen2 in making their reports and insights.
